Mouse Trap Mk2
It turned out that the original mouse trap wasn’t sensitive enough. Very small mice just didn’t trigger it. So I decided to improve the design.
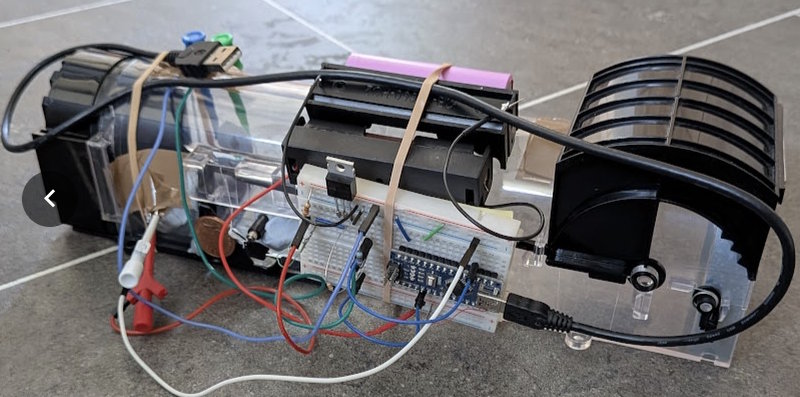
This was my first prototype:
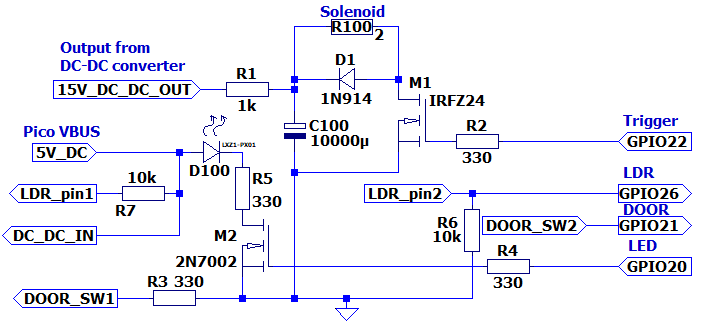
Based on this, I came up with this design (in LTSpice):
And then worked out how to make this on a bit of Veroboard:

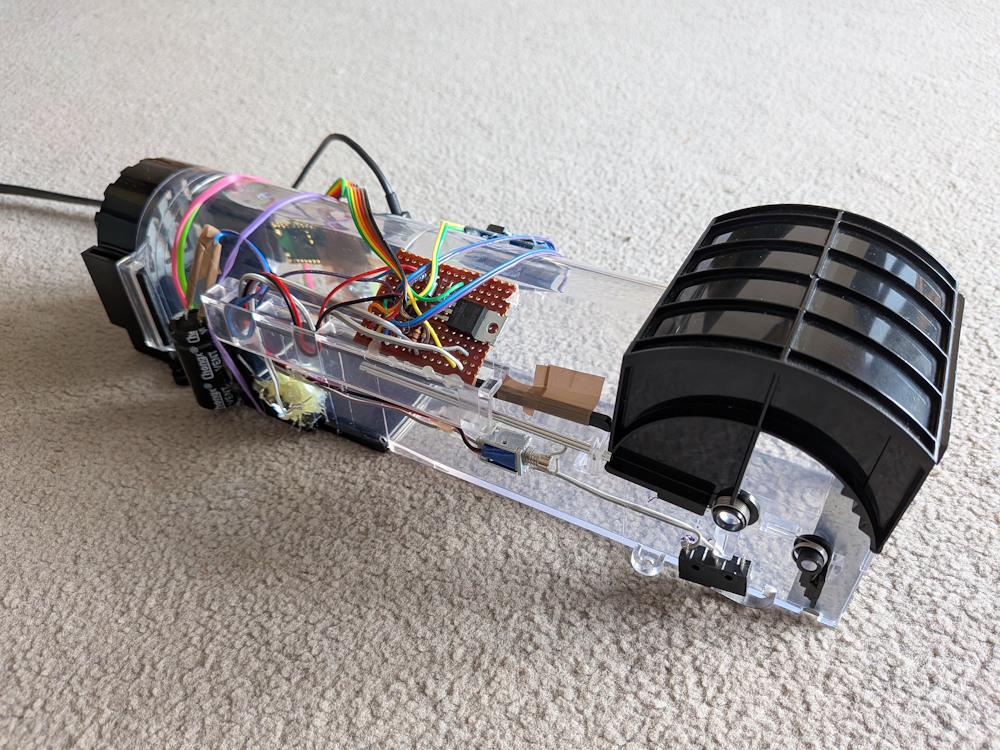
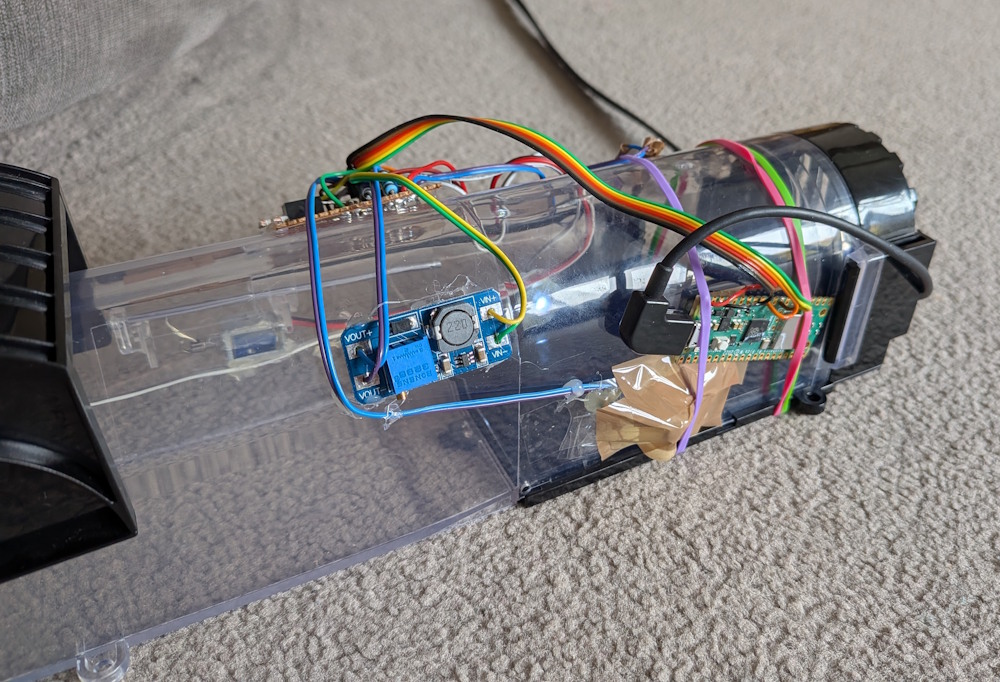
The finished version looked like this:
I programmed the Raspberry Pi Pico board with ESPHome. The Yaml for this was as follows:
 1switch:
 2  - platform: template
 3    id: MouseTrapEnable
 4    name: "Mouse Trap Enable"
 5    optimistic: True
 6  - platform: template
 7    id: MouseTrapTriggered
 8    name: "Mouse Trap Triggered"
 9    optimistic: True
10  - platform: template
11    id: MouseTrapTriggerDoor
12    name: "Mouse Trap Trigger Door"
13    turn_on_action:
14      then:
15        - lambda: |-
16            id(MouseTrapTriggerDoor).publish_state(true);
17            if (id(MouseTrapEnable).state) {
18              id(MouseTrapSolenoid).turn_on();
19            }
20        - delay: 1s
21        - switch.turn_off: MouseTrapTriggerDoor
22    turn_off_action:
23      then:
24        - lambda: 'id(MouseTrapTriggerDoor).publish_state(false);'
25  - platform: gpio
26    pin: GPIO22
27    id: MouseTrapLED
28    name: "Mouse Trap LED"
29  - platform: gpio
30    pin: GPIO20
31    id: MouseTrapSolenoid
32    on_turn_on:
33      then:
34        - delay: 100ms
35        - switch.turn_off: MouseTrapSolenoid
36        - switch.turn_on: MouseTrapTriggered
37binary_sensor:
38  - platform: gpio
39    pin:
40      number: GPIO21
41      inverted: true
42      mode:
43        input: true
44        pullup: true
45    id: MouseTrapDoor
46    name: "Mouse Trap Door"
47sensor:
48  - platform: adc
49    pin: GPIO26
50    id: MouseTrapLDRFast
51    update_interval: 50ms
52    on_value:
53      then:
54        - lambda: |-
55            if (id(MouseTrapEnable).state and id(MouseTrapLED).state and x < 1.9) {
56              id(MouseTrapSolenoid).turn_on();
57            }
58  - platform: template
59    id: MouseTrapLDR
60    name: "Mouse Trap LDR"
61    lambda: 'return id(MouseTrapLDRFast).state;'
62    update_interval: 30s
63    unit_of_measurement: V
64    filters:
65      - round: 3
On line 55 you can see that I compare the ADC value with 1.9. When the LED is on, the LDR voltage is about 2.22V. When something goes between the LED and LDR (i.e. a mouse) the value drops. I chose 1.9V as a suitably lower value. Normal daylight gives a reading of 0.6V - 1.5V. Note that in bright sunlight the LDR can read 2.3V or more, but:
- The trap should be in shaded area.
- Mice are nocturnal, so the best time to catch them is at night.
I had to modify the logging so that the logs weren’t full of ADC notifications. I did this by changing the logging section as follows:
1# Enable logging
2logger:
3  level: DEBUG
4  logs:
5    sensor: INFO
I used the alarm from the Mk1 mouse trap, but modified the automation:
 1alias: Mouse Caught
 2description: ""
 3triggers:
 4  - trigger: state
 5    entity_id:
 6      - switch.mouse_trap_2_mouse_trap_triggered
 7    to:
 8      - "on"
 9conditions: []
10actions:
11  - action: switch.turn_on
12    metadata: {}
13    target:
14      entity_id: switch.mouse_alarm_mouse_alarm
15    data: {}
16mode: single
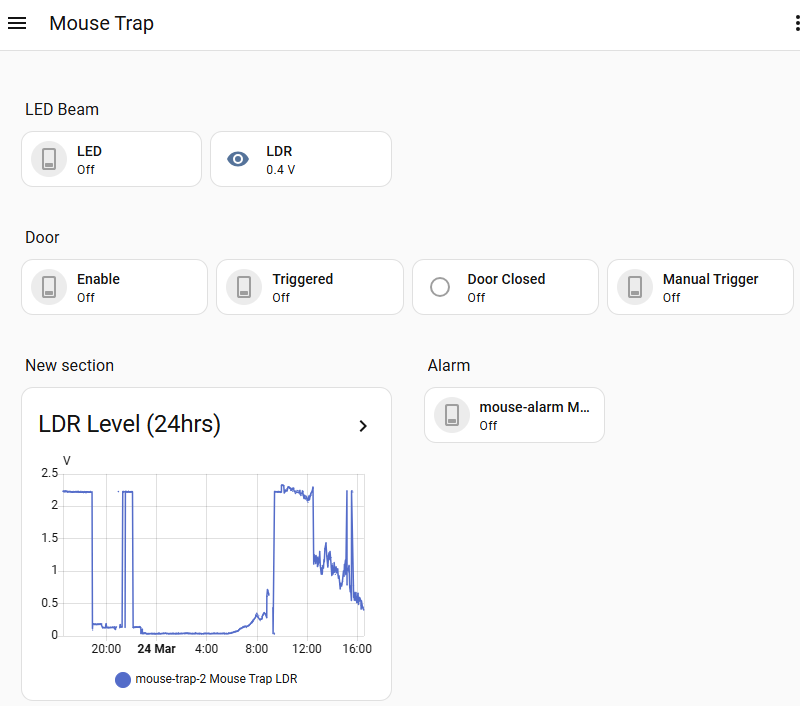
I added the controls to a dashboard which looked like this: